


In this blog post, you will find how (Rayhan RAHIM KHAN) digitiize negatives to achieve high quality art prints.
- I. The equipment
- II. How to proceed
- III. Photographing the negative in several stages to obtain a more defined image (optional)
- IV. Fast alternative : Digitizing negatives handheld, without a tripod
I. The equipment
- A digital camera
- A macro lens (ideally)
- A lightbox
- A tripod
The camera
The choice of camera isn’t critical. You just need to make sure the camera’s sensor has enough resolution.
24 megapixels is more than enough to bring out the details of a 35mm negative. 16 or even 12 megapixels will also give good results.
A self-timer, live view mode, or mirror lock-up (if it’s an SLR) are also recommended.
The lens
The most important thing is to have a high-performance lens. That means no distortion or vignetting—although this can be corrected in post-processing.
But above all, good sharpness is essential when used for macro photography.
Coating is also important.
An old analog macro lens may not like the direct light and will loose contrast and create reflections.*
*I met this problement with a Leica 100mm Elmar Macro lens.
The lightbox
A good lightbox for scanning should ideally have uniform brightness. Uneven brightness will affect the final image.
A lightbox with this an uneven brightness will negatively impact the quality of your scans. However, you can often compensate by using areas where the problem is less pronounced.
The tripod or standing bench
The tripod must allow you to get close enough to the negative and obviously be stable.
You can also use a standing bench (it is even more practical).
II. How to proceed
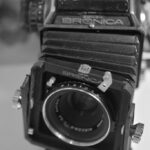
I personally use a Nikon D850 with a Tokina 100mm f/2.8 lens. But other cameras and good macro lenses will do work fine.
As for a lightbox, I use one (CS-Lite) that is engineered for this task. Lightbox engineered for drawing or other tasks, especially the cheaper one, may not be optimal as they often have an unven lighting.
1. The setup
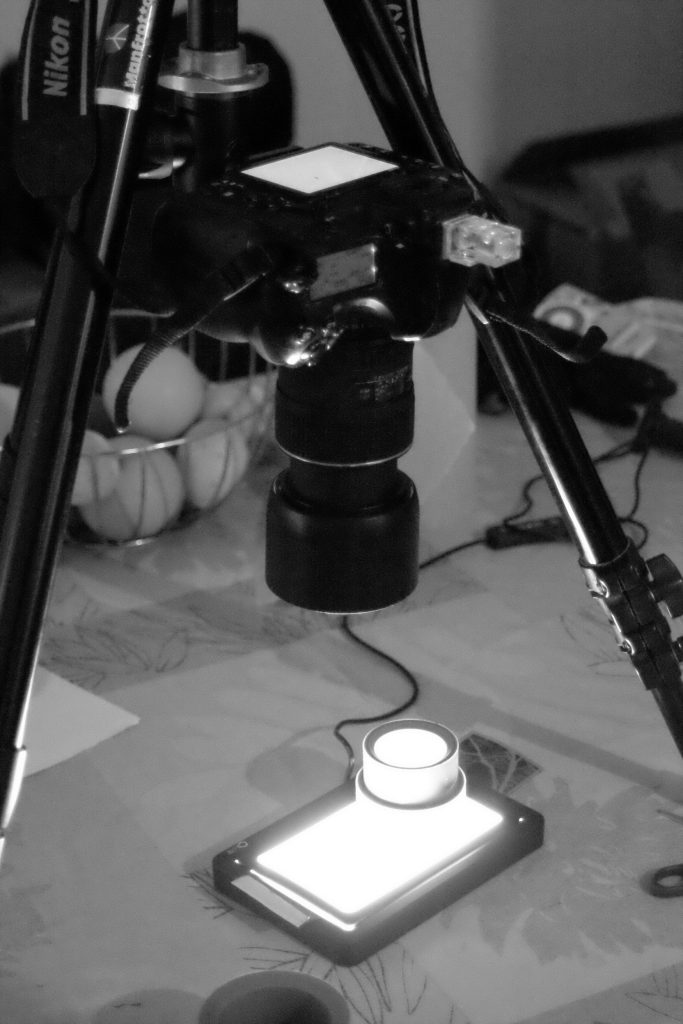
- I set up the tripod and position it correctly.
- I place the camera on the tripod.
- I slide the lightbox table under the camera.
- I place the negative on the light table. I make sure to flatten it completely (you can use objects and place them along the edges of the negative. Some people use a glass plate, but I don’t like adding an element between the negative and the lens).
I recommend placing the emulsion negative facing the camera to avoid unwanted reflections. - I position the camera at the correct distance. I check that the camera is parallel to the ground using a spirit level.
- To focus I switch the camera to live view mode and zoom in (digitally, of course) as much as possible on the negative. I then turn the focus ring until I see grain appear.
-Be careful, don’t rely on focus peaking! This focusing aid lacks precision!
Once everything is clear, I begin the scanning:
2. Digitizing
- I set the image quality to RAW in order to have more latitude to process my images later. Activate mirror lift mode if your device does not have live view.
- I adjust the exposure:
– The lowest possible ISO for the best image quality.
– As for the aperture, I recommend staying between f/5.6 and f/11 to prevent diffraction from degrading the image. But every lens is different.
– Some recommend keeping the histogram as far to the right as possible. But personally, I don’t bother with that. - I turn off the light and close the curtains to avoid unwanted reflections.
- I set the self-timer to five seconds to avoid camera shake caused by pressing the shutter when taking the picture. You can also use an external shutter release to save time.
3. Post-processing
I transfer the scans to the computer. I invert the colors in the post-processing software (photoshop, darktable or other) and then rework the image.


III. Photographing the negative in several stages to obtain a more defined image (optional)
It’s possible to photograph several sections of the negative and regroup them using post-processing software.
For example, a camera with a 16-megapixel sensor can produce 64-megapixel scans if the negative is photographed in four sections.
You can find an example of someone using this technique here : https://www.youtube.com/watch?v=Sajhx4IRHJc.
IV. Fast alternative : Digitizing negatives handheld, without a tripod
With a lightbox
The best tool for handheld scanning with a lightbox remains a smartphone. (smaller sensor and therefore larger depth of field, but also a faster lens).
It is still possible, however, to handheld scan a negative with a digital camera. Here, as with the phone, you will need a sufficiently powerful light table to allow for fast shutter speeds.
You can also increase the ISO to achieve this. If the shutter speeds are too slow, you will get motion blur.
Since the slightest movement can take you out of focus, you will need to find a way to stabilize the camera. This will also further reduce motion blur. You can also shoot in burst mode to ensure you get a good scan.
Other option
There are also other devices, such as the Nikon ES-2, which attaches to the front of the lens and allows you to digitize negatives like the one mentioned above, making the scanning process easier.
You must ensure you have compatible equipment.


Leave a Reply