



Under What Conditions Does This Problem Appear?
Under Artificial Lighting
If you record video under artificial lighting (fluorescent tubes, bulbs, LEDs), you may end up with flickering footage where brightness changes noticeably from one frame to another, creating an unpleasant effect.
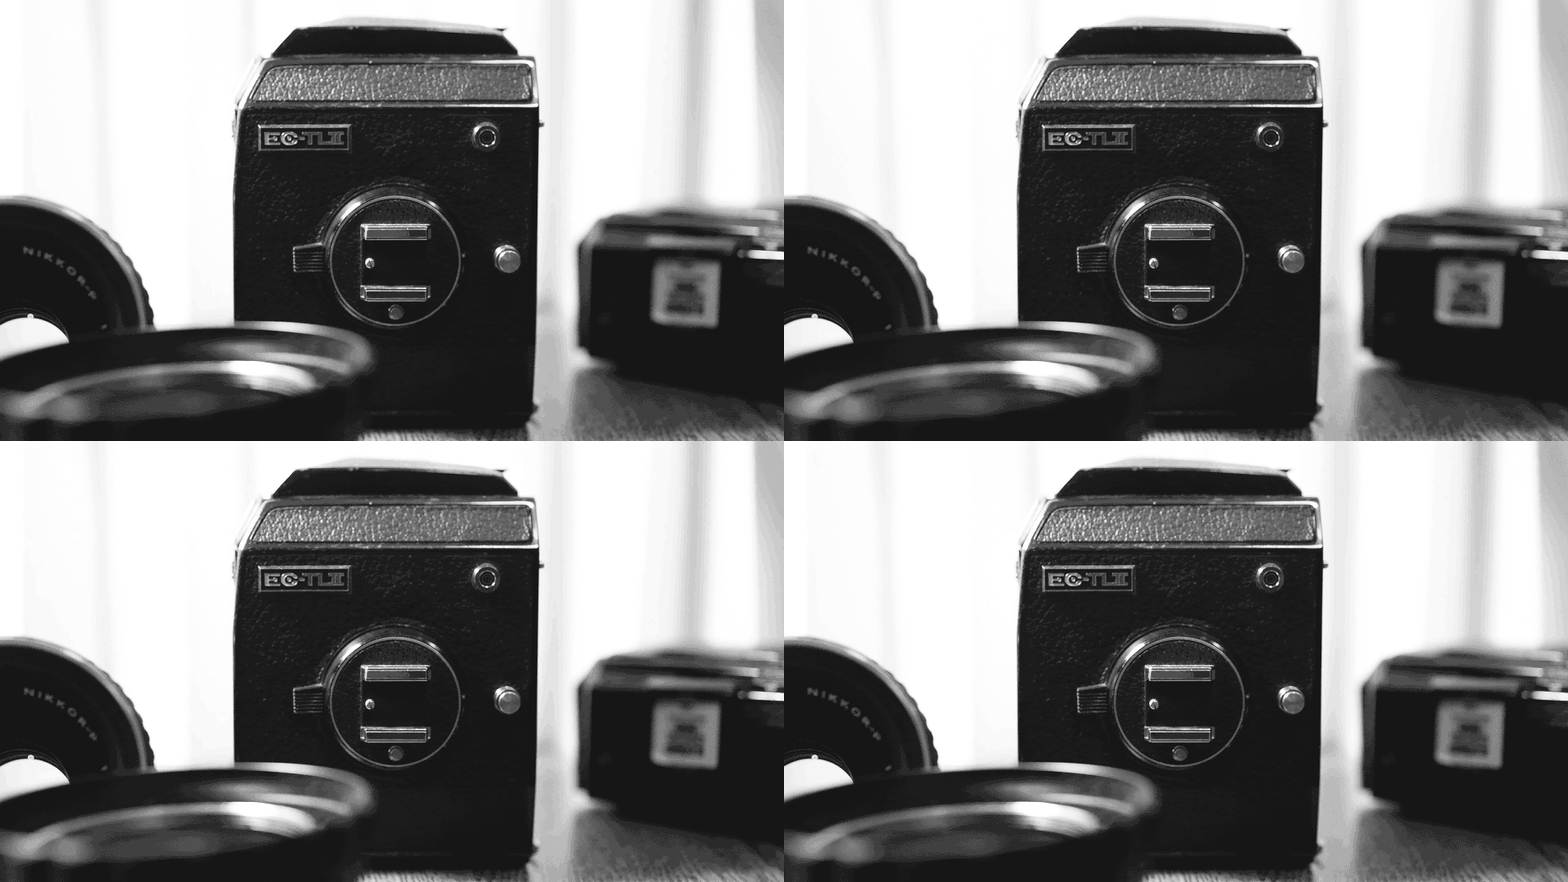
What Causes This Phenomenon?
Artificial light sources do not emit perfectly stable light. Their intensity fluctuates very rapidly.
What Happens for the Human Eye
This is not noticeable to the naked eye because of what is known as persistence of vision: our ability to merge multiple images into one.
This allows us to perceive a stable “average” of the light source.[1]
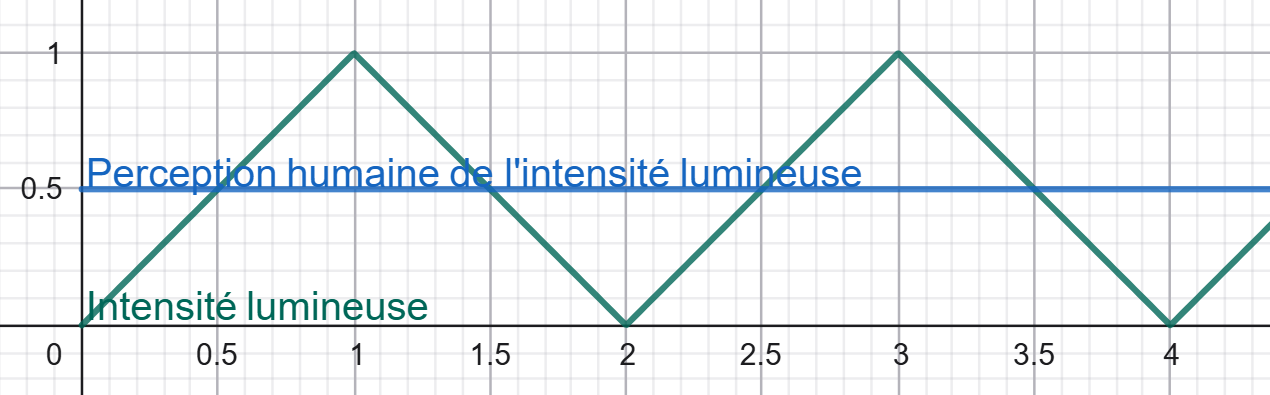
Horizontal axis: time
What Happens for the Camera
A camera works differently from our eyes. It does not calculate an “average” but captures a single image at a specific moment for a very short duration. By displaying these images in sequence, a video is created.
Flickering appears when the camera captures frames at moments where the light intensity differs:
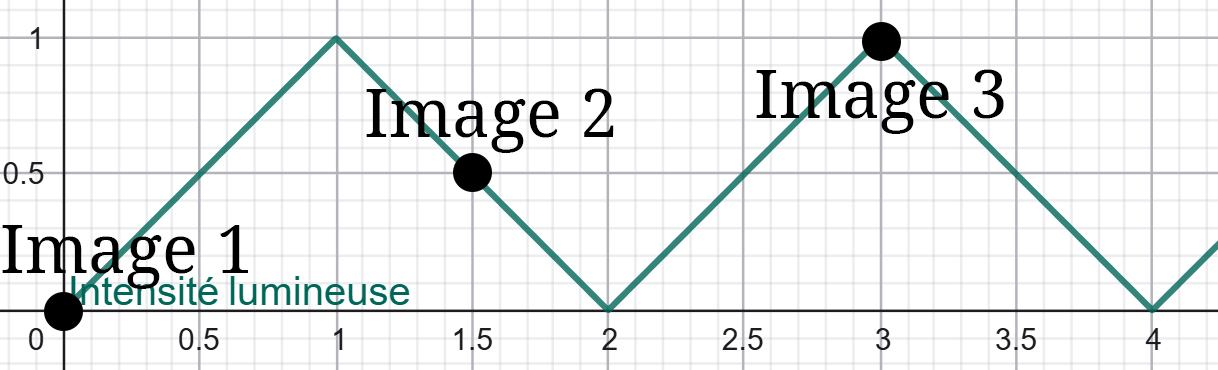
Horizontal axis: time
How to Fix This Problem
Choose the Correct Frequency
Before filming, you can avoid the issue by choosing the correct frame rate and shutter speed.
For example, if the light flickers 50 times per second, you should record at 50 frames per second. Do not hesitate to experiment to find the correct frame rate (in Europe, 25 or 50 fps are generally used because electrical current is distributed at 50Hz).
As for shutter speed (the duration each frame is exposed), the common rule is to use a shutter speed twice as fast as the frame rate. For example, if I record at 25 fps, the shutter speed should be 1/50th of a second for each frame.
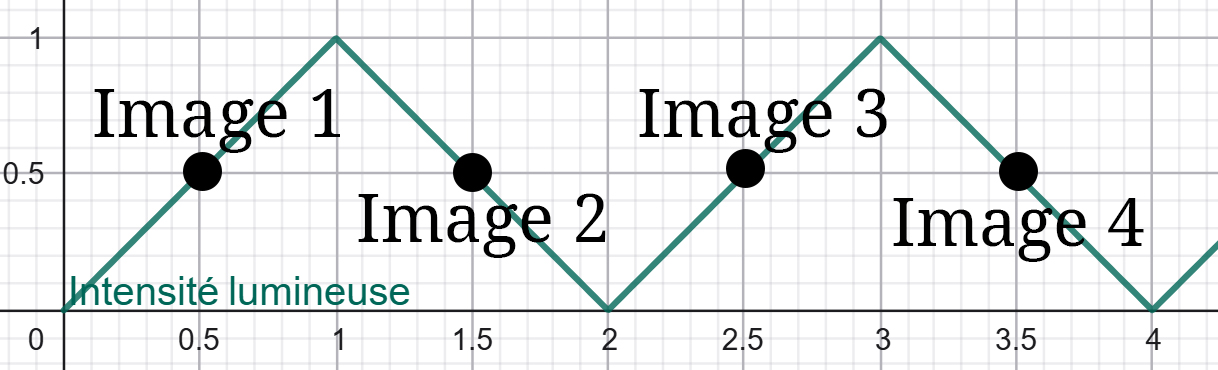
Horizontal axis: time
Correcting It Afterwards
If you recorded the video at the wrong frequency, all is not lost.
Some editing software includes built-in tools to reduce or correct flickering.
If you do not use such software, you can still rely on a more “manual” solution:[2]
Taking Inspiration from Persistence of Vision
The idea is to create an “average” of the frames.
To do this, duplicate your video into 2 or 3 sequences. Offset each sequence by one frame relative to the others. Set the opacity of the first sequences to 50% and keep the last one at 100% opacity.
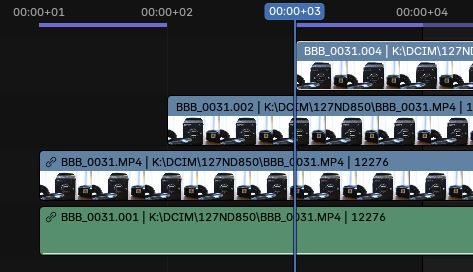
The result:
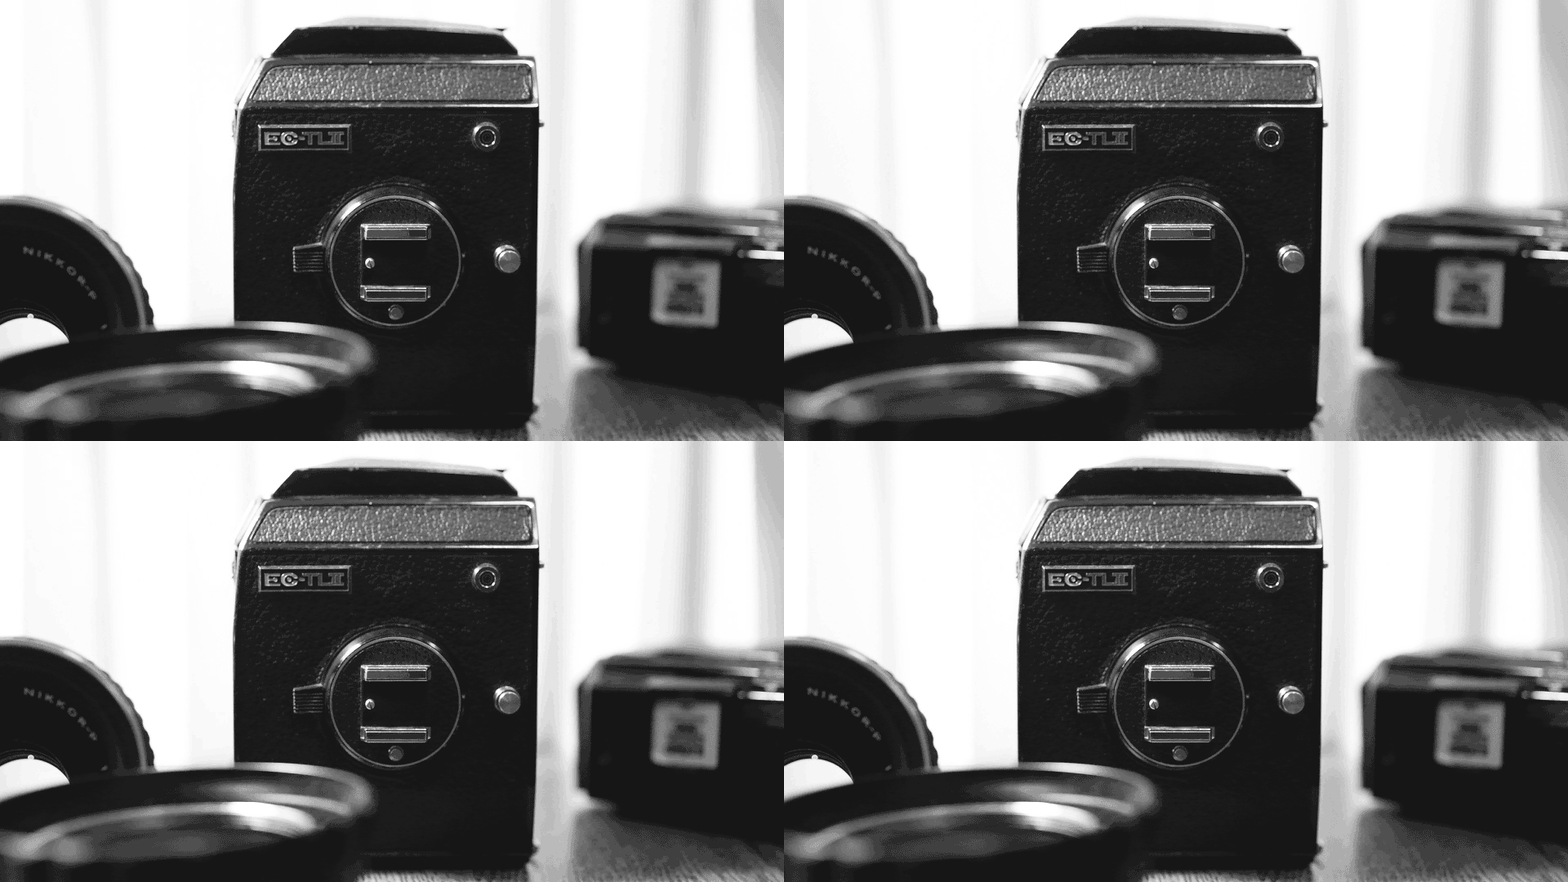
Before:
After:
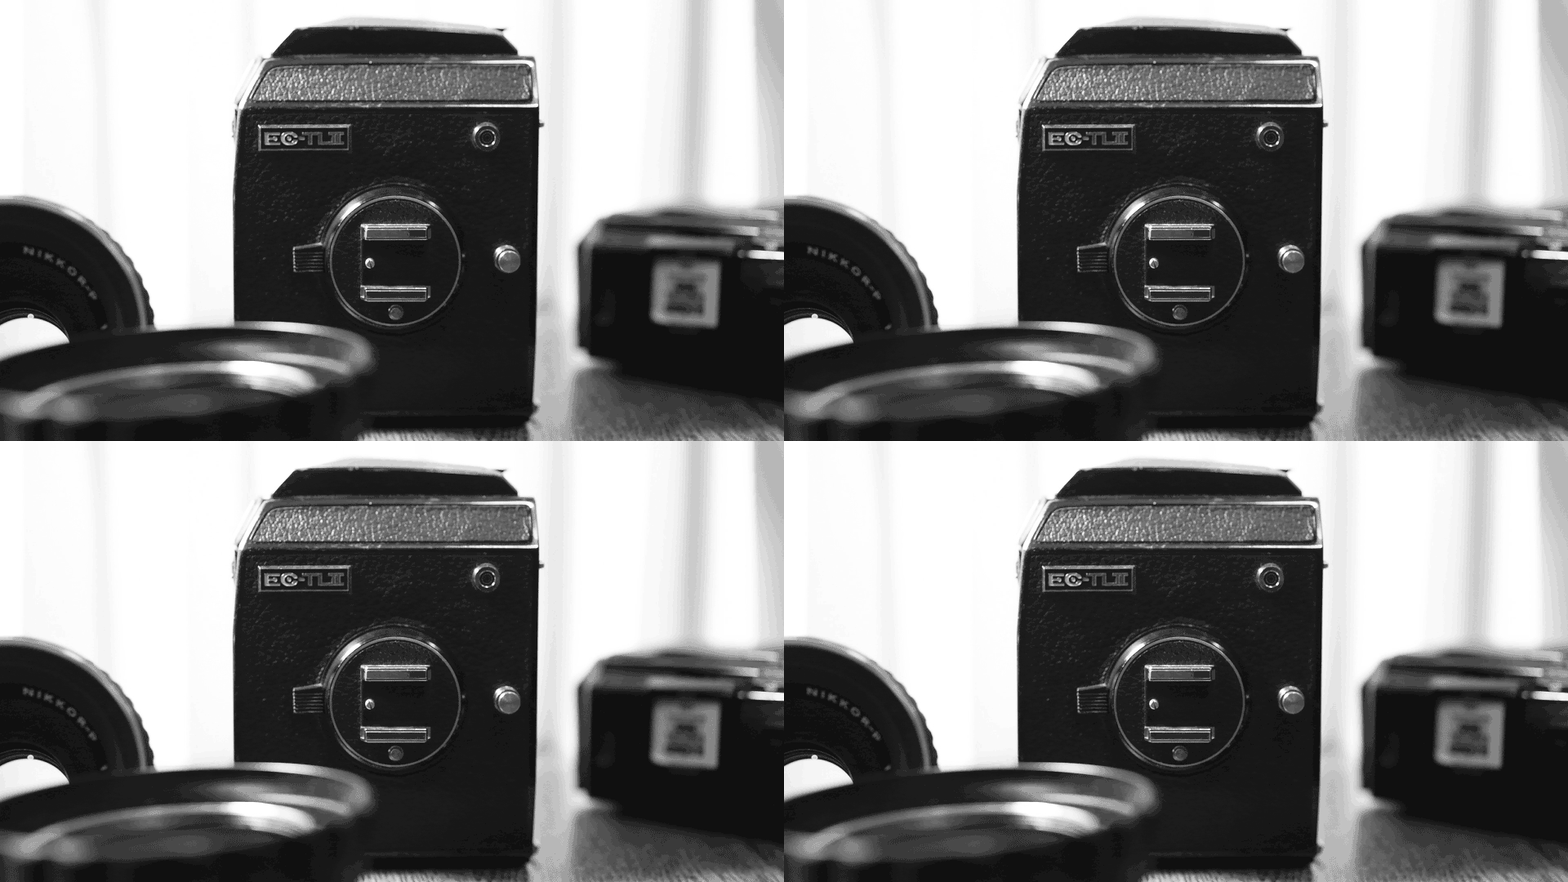
As you can see, the flickering is significantly reduced.
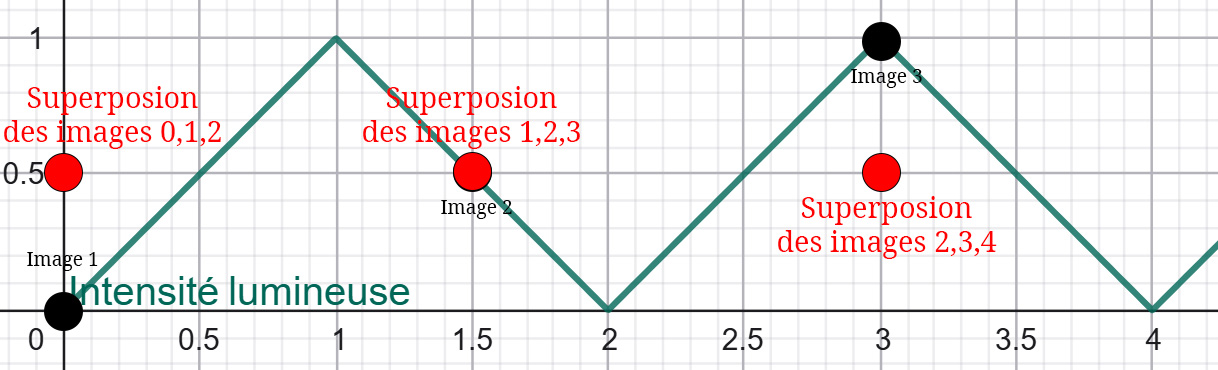
Horizontal axis: time
An Imperfect Solution
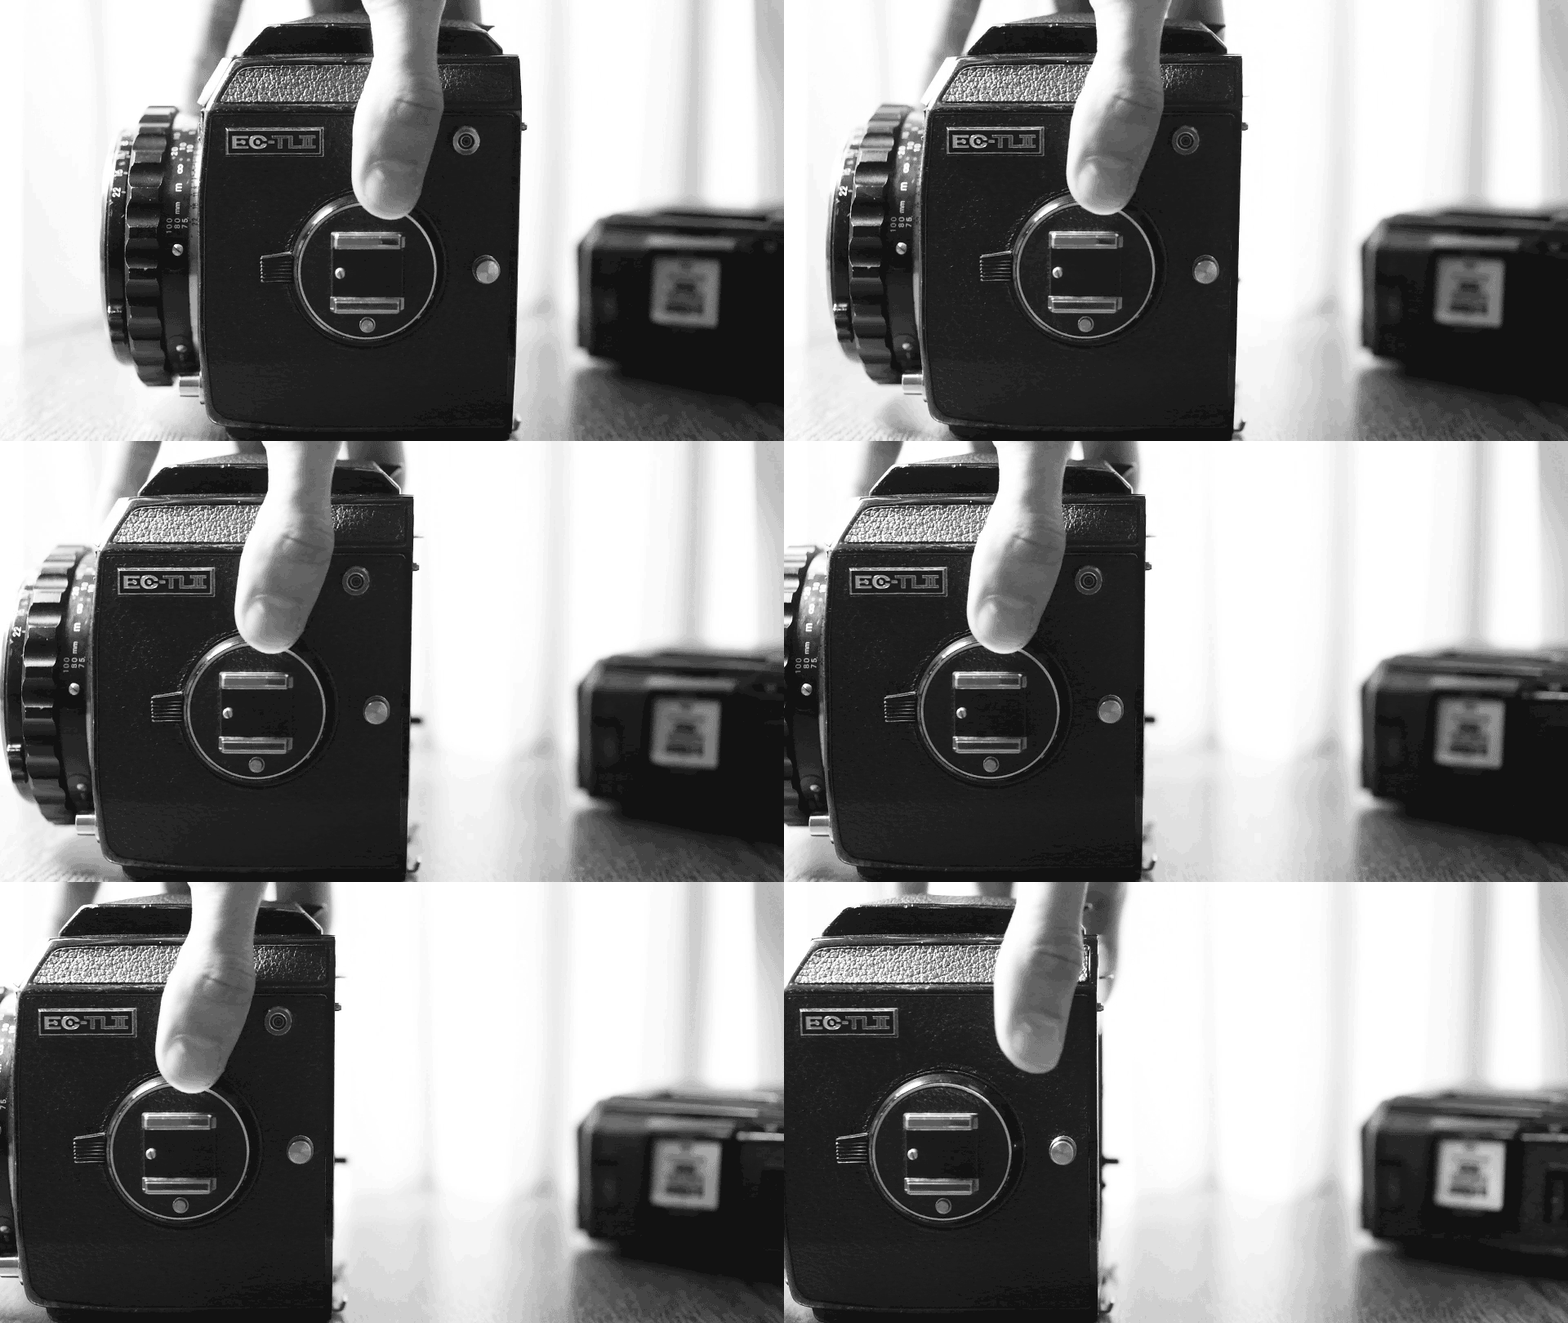
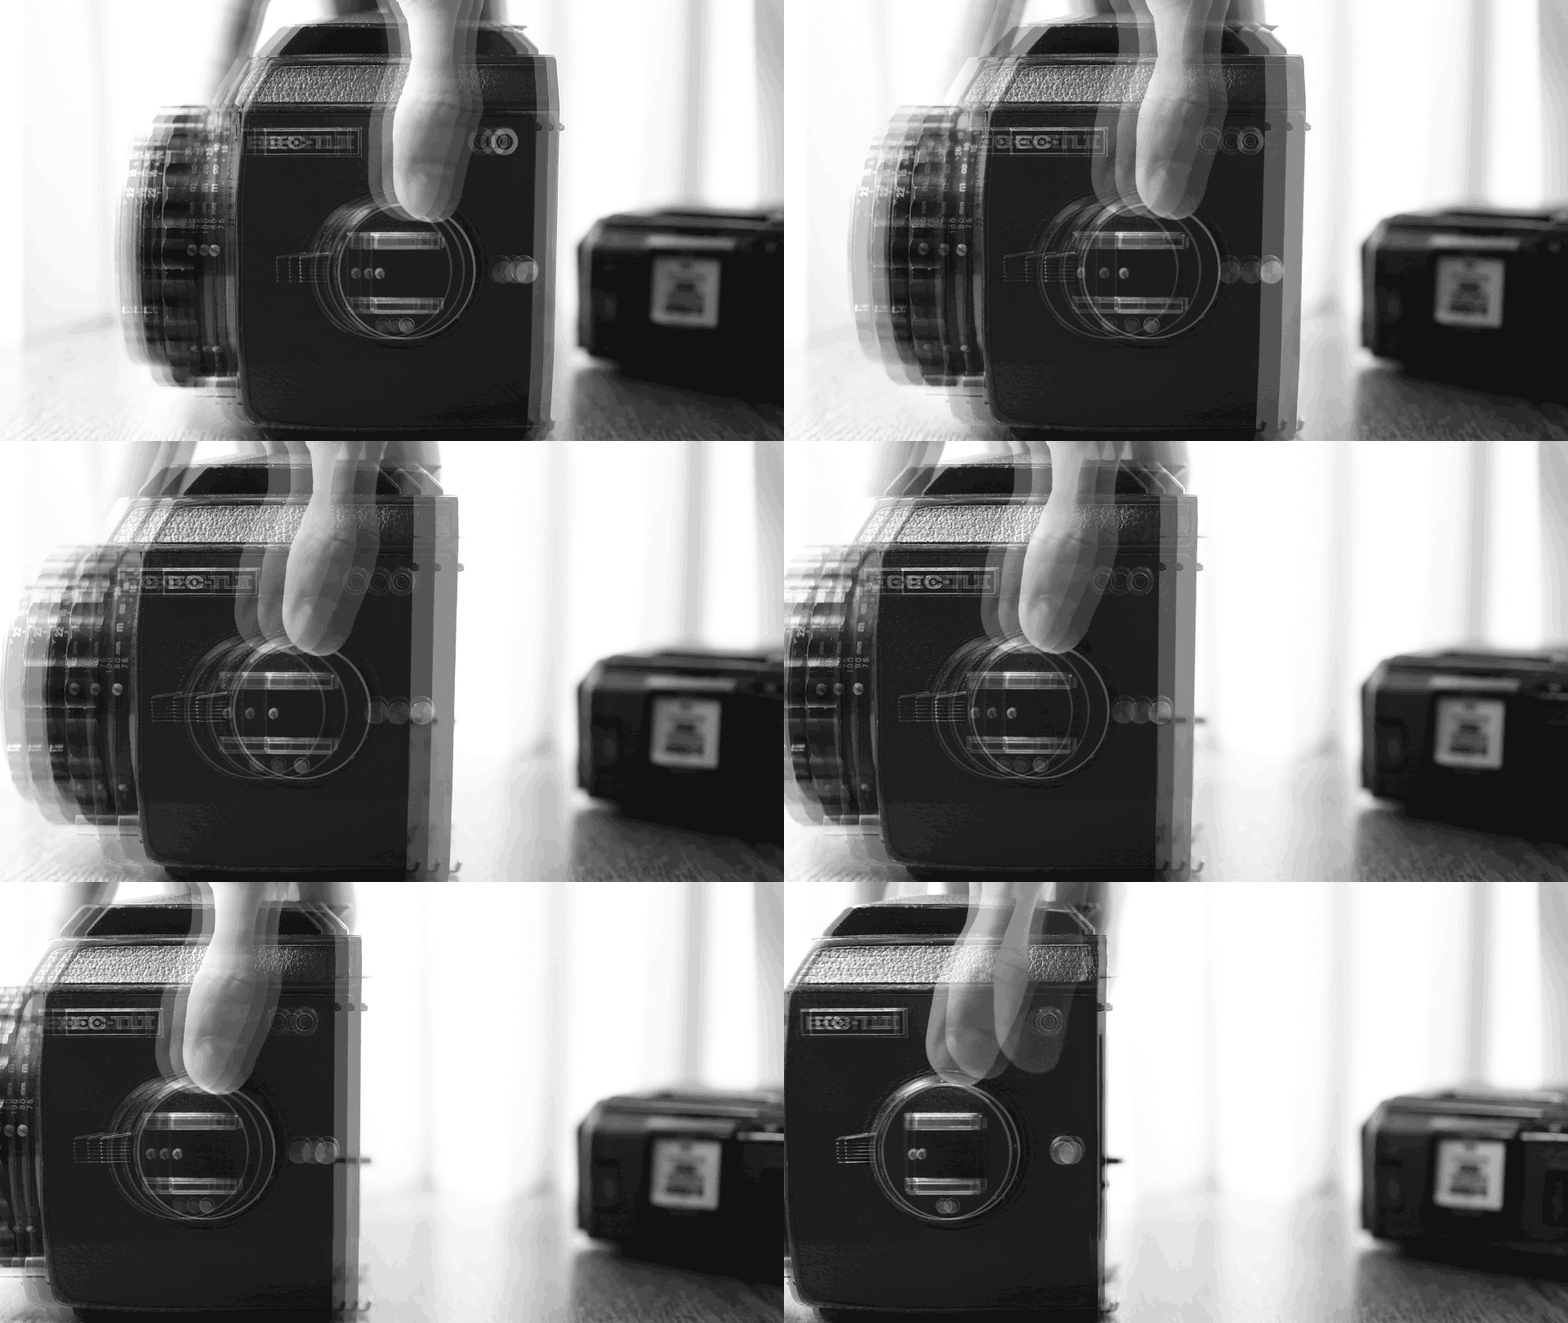
For static scenes, this solution works very well. However, when there is movement in the frame, it will introduce motion blur:
Original:
With flicker correction:
[1] These graphs are intended to explain the principle and are not scientifically exact.
[2] Solution found here:
https://www.reddit.com/r/VideoEditing/comments/121qo93/best_antiflicker_plugin/
Jeff_Bridgesii:
“I don’t know about plug-ins these days, but the last time I ran into a similar situation I found a low-tech solution on the web which worked for me: duplicate the video track, change the opacity of this new track (sitting on top) to 50%, then offset it from the original track by one frame. This smooths out the variation in brightness / flickering, or at least makes it much less noticeable.”




Leave a Reply