


Table of Contents
- Getting Started with Macro Photography
- Getting Closer to Your Subject
- Focusing
- A Stable Tripod and Easy-to-Adjust Head
- A Macro Scissor Lift Table for Positioning
- Lighting
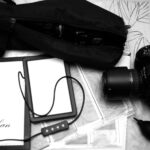
Getting Started with Macro Photography
To take great photographs, you obviously need a good lens, but everything else around it also plays a crucial role in creating a beautiful image.
Getting Closer to Your Subject
It is not always possible to achieve the desired magnification ratio using the lens alone.
You need the right tools to bring the lens closer to the subject being photographed.
To do this, you can use:
Bellows
Extension Tubes or Bellows?
A macro bellows offers more flexibility and ease when determining the magnification ratio. However, they very often do not maintain automatic camera functions.
A bellows can also feature tilt and shift functions, allowing you to alter the plane of sharpness very precisely.
It also frequently includes a focusing rail.
The presence of tilt-and-shift functionalities or the ability to move the entire assembly is not always standard on all bellows.
Extension tubes, on the other hand, are a more compact solution and usually feature electronic contacts or mechanisms allowing you to retain automatic functions (exposure modes, aperture control, autofocus).
However, you will need to add a focusing rail if using them on a tripod.
Not all reverse adapters have electronic contacts or other mechanisms that retain automatic functions.
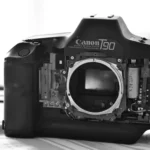
The Reverse Mount Ring
Another particularly economical solution for macro photography is using a reverse mount ring.
Indeed, when mounted backward, a lens can become highly effective for extreme close-up photography.
Naturally, there are no automatic functions (autofocus, exposure modes other than aperture priority) when using a reverse mount ring.
Close-Up Lenses (Macro Diopters)
You can also use a close-up lens filter, which screws onto the front of your lens like a regular filter.
In this case, look for high-quality diopter lenses so as not to compromise the lens’s performance. In this regard, B+W is a well-recognized filter brand.
The Best-Performing Solution
Using a dedicated macro lens combined with a bellows or extension tubes will deliver the highest image quality.
However, you can still achieve great results with a reverse mount ring or a close-up lens filter.
Focusing
Whichever method you choose, relying on autofocus or the lens’s focus ring is not recommended.
In fact, moving the lens elements alone as you normally would also alters the magnification ratio (which is undesirable).
Instead, you want to move the entire setup (camera and lens together) to achieve focus without changing the magnification ratio.
To do this, a focusing rail is used.
A Stable Tripod and Easy-to-Adjust Head
Precision and stability are vital to guarantee the best results.
Therefore, you need a particularly stable tripod, as the slightest movement can lead to noticeable camera shake at this distance.
You also need a tripod head that allows for easy camera manipulation and can safely support the weight of the entire setup.
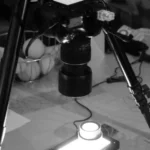
A Macro Scissor Lift Table for Positioning
In macro photography, it is much easier to move the object rather than struggling with the tripod and camera to compose your image.
A lab jack or lift table is an essential accessory for this task (otherwise, you will tire yourself out stacking books and magazines to position the object correctly – I speak from experience).
Inexpensive lab jacks can easily be found.
However, for greater comfort and precision, it is better to invest in a well-finished lift table.
Lighting
Lighting is paramount in macro photography to achieve stunning images.
The simplest solution is to use a ring flash that mounts directly onto the front of the lens.
Alternatively, you can choose setup options with off-camera flashes to gain much greater control over your lighting.


Leave a Reply