

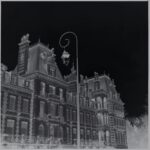
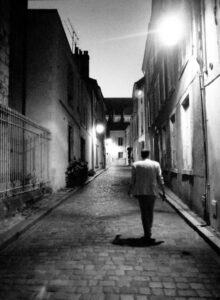
Negative Analysis
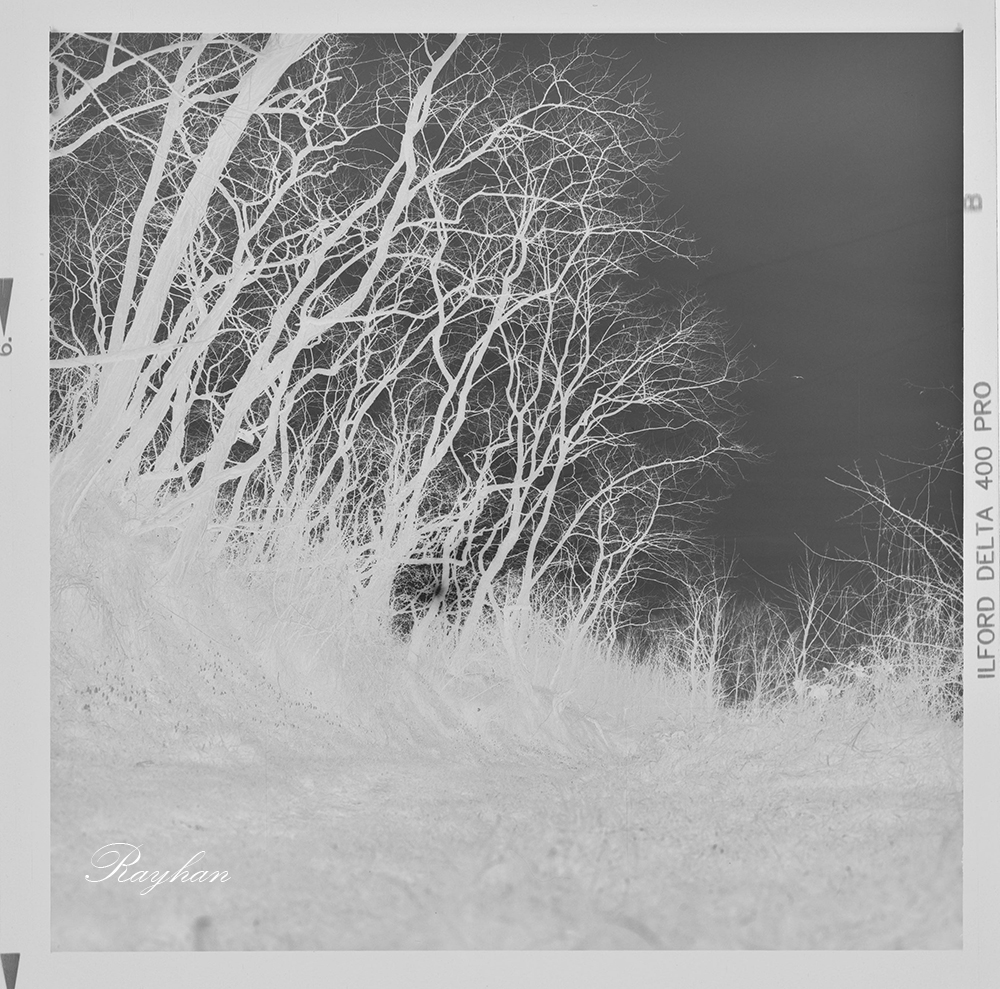
The negative is globally underexposed, we have low to medium, when dense part is absent.
Otherwise, the first thing that stands out is the dual nature of the negative: the sky is perfectly exposed, while the ground is underexposed, although details are still visible.
The Objectives
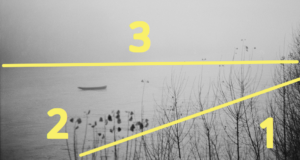
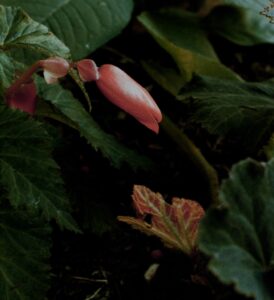
The goal when printing this negative is to achieve dark tree silhouettes (it is a winter late afternoon scene) while still preserving details – the trees and the lower part of the image should not become completely black.
Likewise, the snowdrops in the lower-left corner of the image should stand out clearly within the vegetation and appear bright white.
The Methods
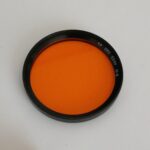
A Grade 0 Filter for a Highly Contrasted Negative
Since the negative is highly contrasted, I will use a grade 0 filter to preserve details both in the sky and on the ground.
A grade 0 filter provides the lowest contrast and helps reduce the original contrast of the negative.
The lower part of the image lacks density, even though some details are still visible.
Analysis of the Final Darkroom Print
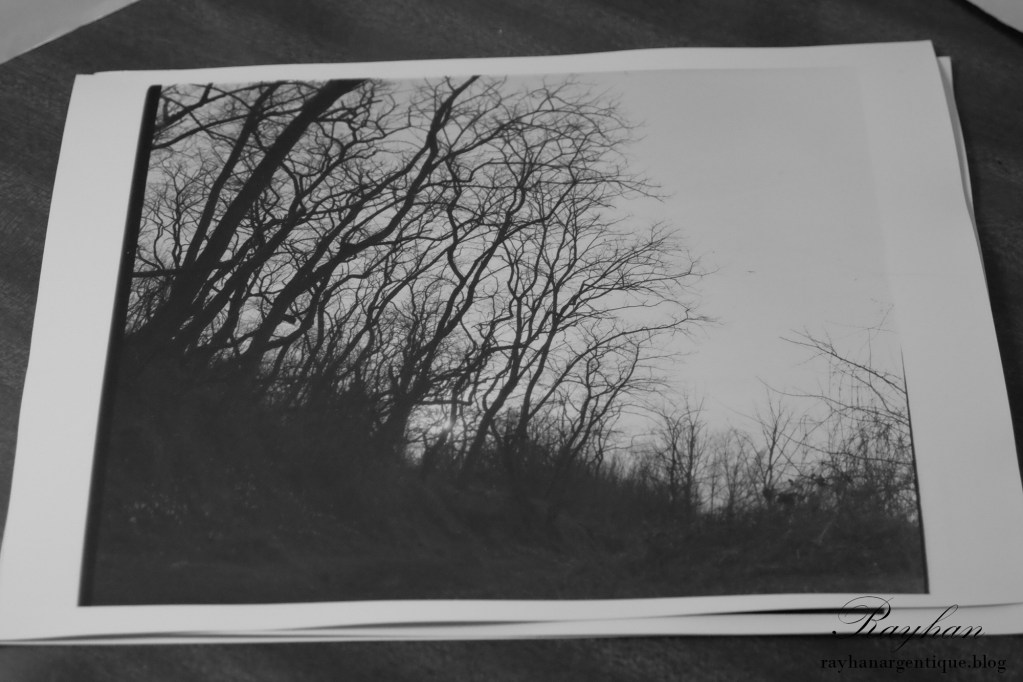
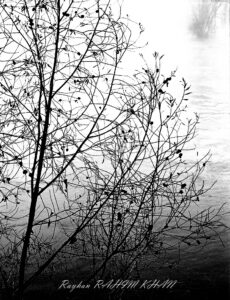
The Snowdrops Do Not Stand Out
Although the overall contrast matches what I wanted, the snowdrops do not stand out.
Where they should have appeared bright white, they instead look dull gray and blend into the dark vegetation.
Even the sky appears slightly too dark. The paper should have been exposed for a shorter time under the enlarger to perfect the print.
How to Make the Snowdrops Stand Out
By Using Masking
I did not push the process that far, but here is how I would have improved the image:
I would have exposed the upper part of the image with a grade 0 filter and the lower section – starting from the area where the snowdrops appear – with a grade 2 filter. Using a higher contrast grade would have allowed the snowdrops to remain white instead of turning grayish.
At the same time, I would have ensured that the transitions created by masking and the use of different contrast filters blended together discreetly.
Retouching to Achieve the Desired Result
In the end, I believe the negative was not truly recoverable simply by adjusting contrast filters.
The real solution would have been retouching: going back over the print with a brush to lighten the snowdrops.
Or simply exposing the negative differently from the start.
Underdeveloping the film and overexposing slightly (rating the film at 200 ISO instead of 400 ISO) would also have produced a more balanced negative that was easier to work with.
The “Digital Print”
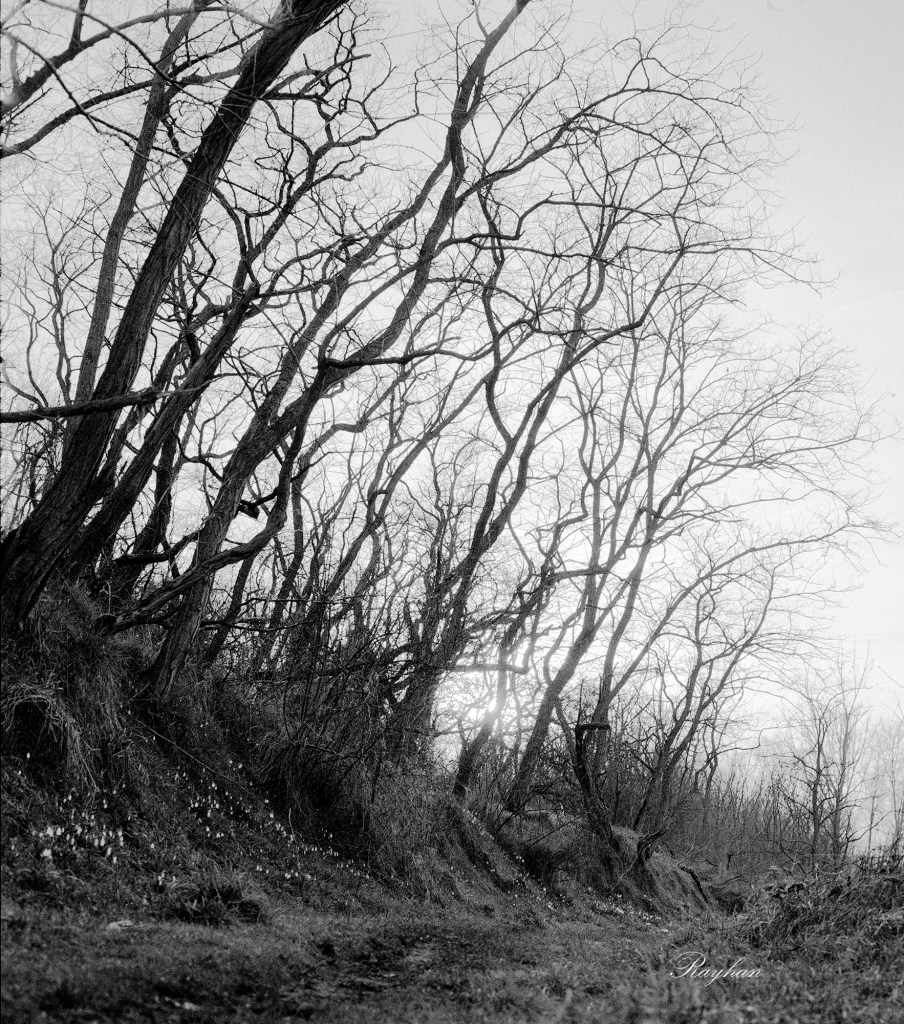
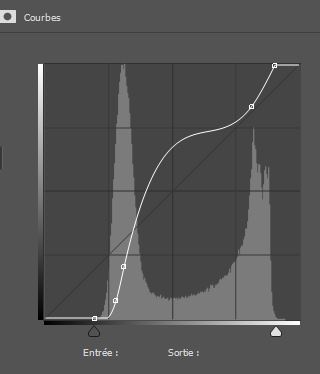
Of course, digital processing allows for much greater freedom, as you can see with this contrast curve – something that would be impossible, or at least very difficult, to achieve with traditional darkroom paper.
Masking is also much easier digitally. I took the time to individually mask each snowdrop to make them appear brighter and whiter.
As mentioned earlier, this operation is also possible with a silver gelatin print by retouching the print with a brush after exposure. However, the margin for error is extremely small.
A Comparison
I am still a beginner in darkroom printing and I am realizing that certain imperfections that can easily be corrected on a computer are far less forgiving when working with an enlarger and traditional silver gelatin printing.
In this case, the fact that the negative was too contrasted and underexposed prevented me from recovering enough detail in the trees during the darkroom printing process. I could not correct the issue any further since I was already using the lowest-contrast grade 0 filter.

Leave a Reply